AVEO
Documentation for AVEO - Responsive WordPress Theme
Theme Installation
To install this theme you must have a working version of WordPress already installed. For information in regard to installing the WordPress platform, please see the WordPress Codex - http://codex.wordpress.org/Installing_WordPress
Extract the zipped package downloaded from ThemeForest to your desktop, in the extracted package you will find aveo.zip file which is the WordPress theme.
You can install the theme in two ways:
1. Upload theme using WordPress admin panel
- Navigate to Appearance -> Add New Themes -> Upload page.
- Select
aveo.zipfile. - Press the Install Now button to upload and install the theme.
- After uploading the theme, you need to activate it. Navigate to Appearance -> Themes page to activate the theme.
- Also, navigate to Appearance -> Theme Options page and click Save changes button to activate theme options settings.
2. Upload theme via FTP
- Extract
aveo.zipfile - Upload the extracted folder to /wp-content/themes/ folder on your server.
- After uploading the theme, you need to activate it. Navigate to Appearance -> Themes page to activate the theme.
- Also, navigate to Appearance -> Theme Options page and click Save changes button to activate theme options settings.
Once the theme is activated you will be asked to install the following plugins. Please install and activate all of them:
- LMPixels Framework
- AVEO Contact Form
- AVEO Portfolio
- AVEO Share Buttons
- AVEO Shortcodes
- AVEO Tracking, External CSS and JS
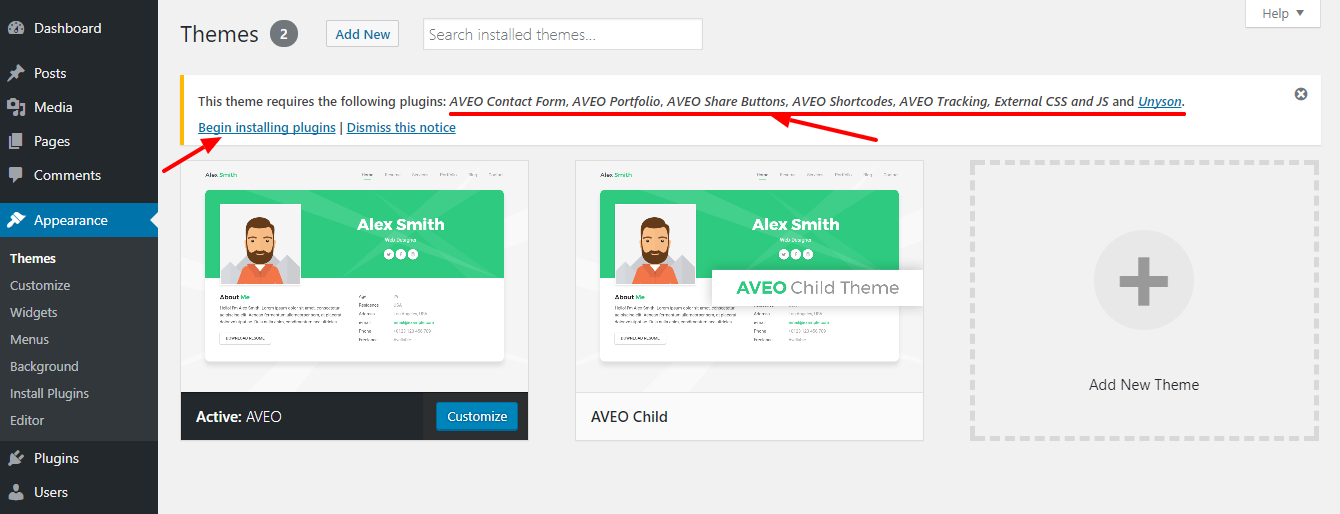
Click on the "Begin installing plugins" link.
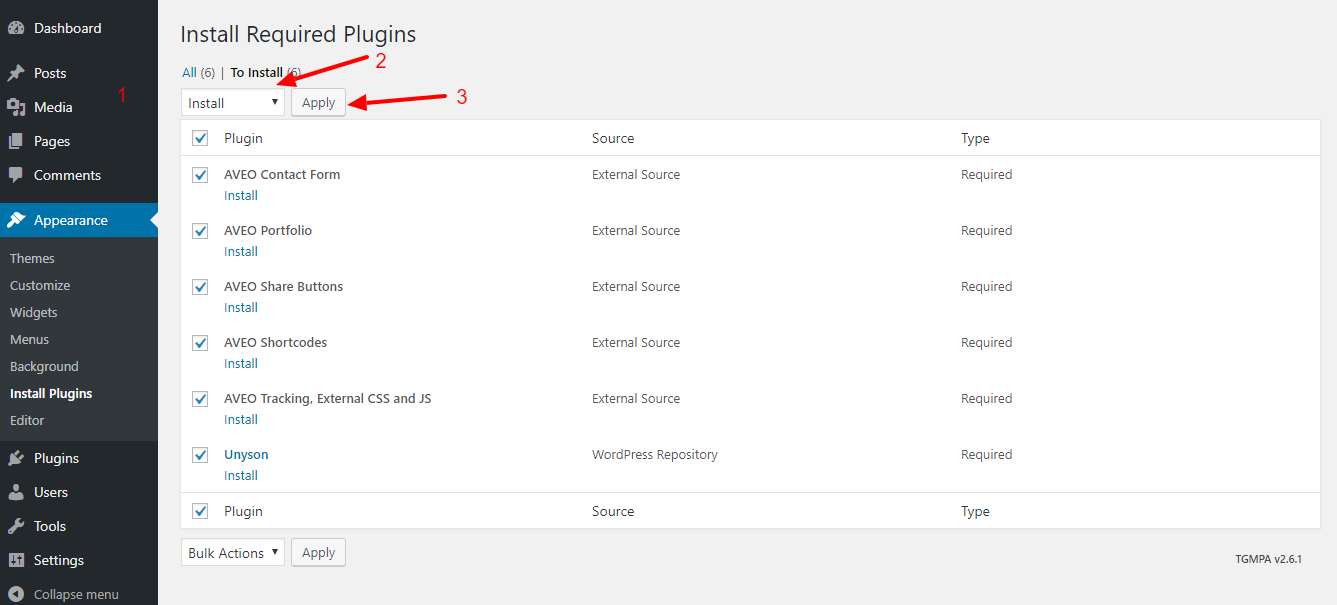
Click on the "Install" link of all plugins.
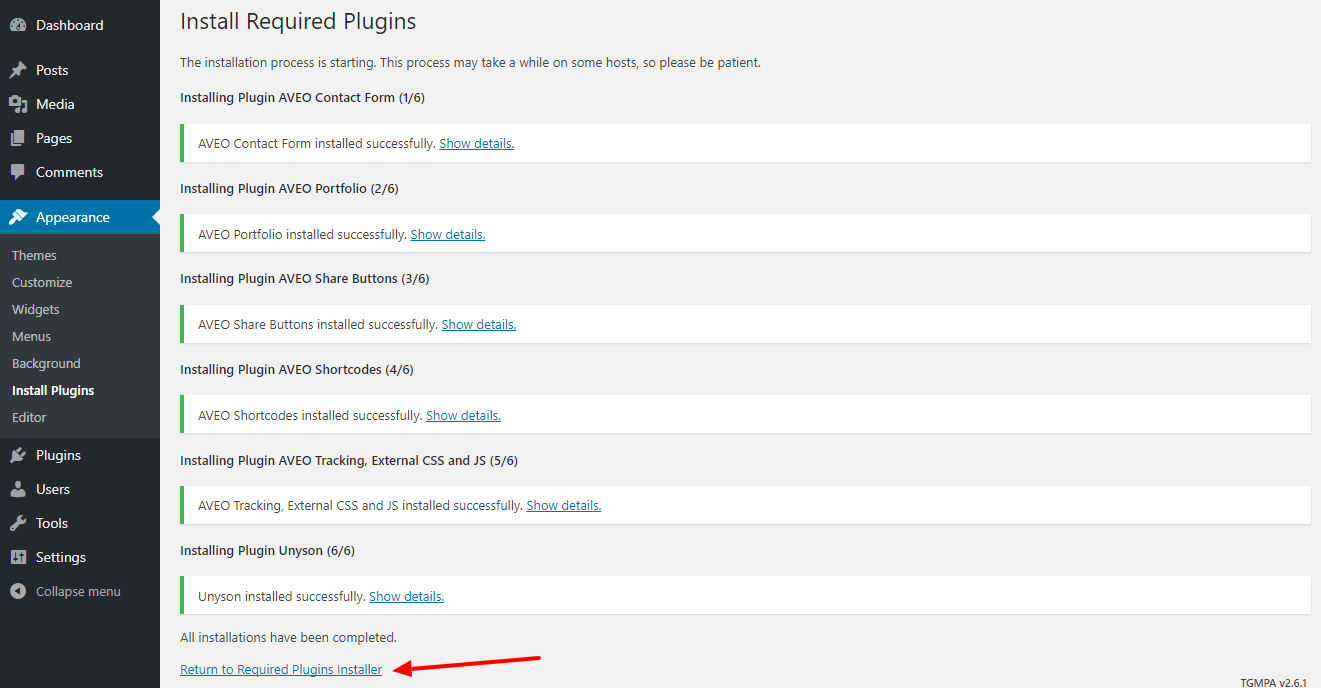
Click on the "Return to Required Plugins Installer" link of all plugins.
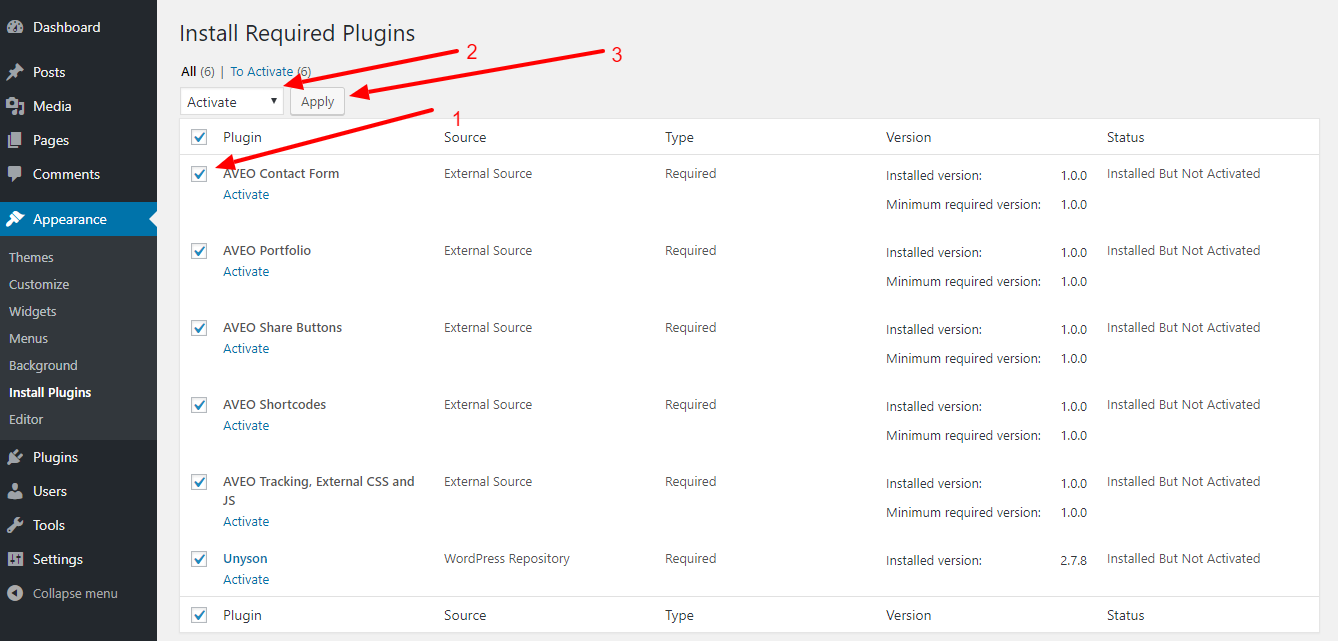
Click on the "Activate" link of all plugins.
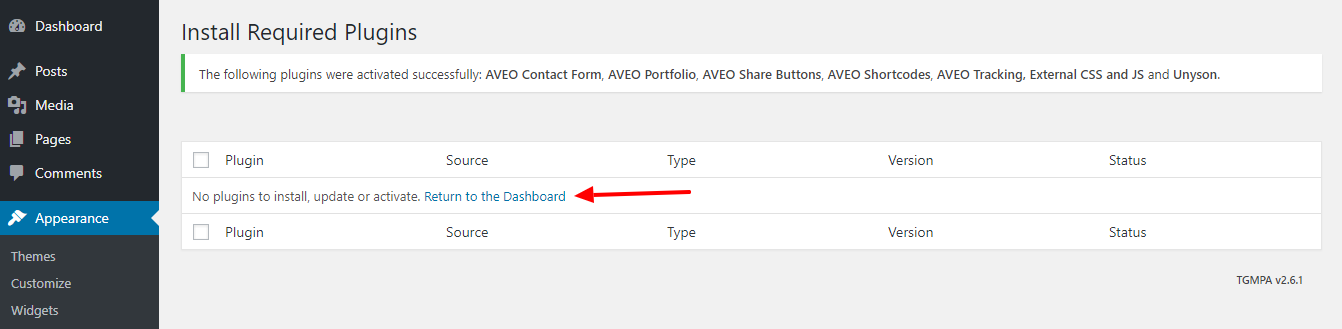
Click on the "Return to the Dashboard" link.
Activating LMPixels Framework Extensions
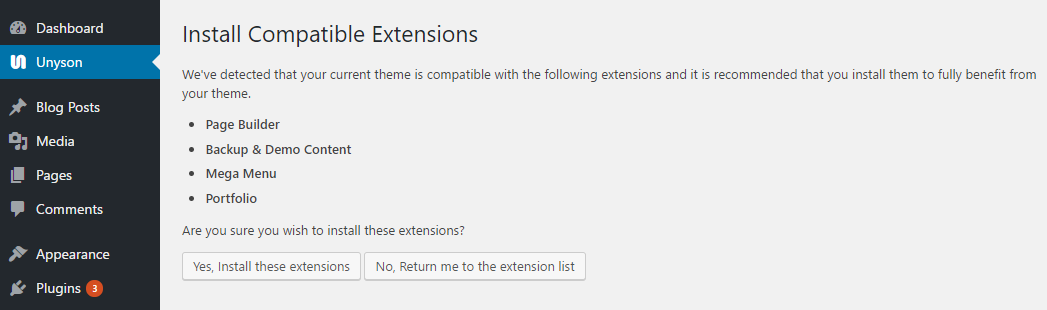
Once you install and activate all the plugins required go to Dashboard->LMPixels Framework and you will be asked to activate the following LMPixels Framework Extensions:
- Page Builder
- Portfolio
- Mega Menu
- Backup & Demo Content

Please activate all the above four.
Theme Update
There are 3 methods to update WordPress themes to newer version. These new updates are essential if you want to have a bug free website as we give new features and improvements to the theme over time. Some of these updates might be needed in order to make the theme compatible with wordpress newer versions. There is no risk on losing your settings and pages. However if you had done modifications in parent theme files, then they will be lost.
Please note that before updating a theme, we recommend you to make backup of your modified files.
Before beginning the upgrade, please do not forget to backup the database. To do this, go to Admin Dashboard --> Tools --> Backup and click on the Create Full Backup Now button.
1. Via the admin panel
- Please open Appearance -> Themes
- Choose another theme (not AVEO or AVEO Child)
- Delete AVEO theme
- Install updated theme AVEO version X.X.X (Appearance -> Themes -> Install Themes -> Upload)
2. Using ftp
- Use ftp-client to open folder with installed theme (../wp-content/themes/);
- Delete folder AVEO
- Copy unzipped and updated folder with AVEO theme
3. Using Envato Market Plugin.
More info - Envato Market Plugin.
AVEO Theme Plugins Update
You can find the list of updated AVEO Theme Plugins in Documentation folder (updates.txt).
Before beginning the upgrade, please do not forget to backup the database. To do this, go to Admin Dashboard --> Tools --> Backup and click on the Create Full Backup Now button.
There are 3 methods to update AVEO theme plugins.
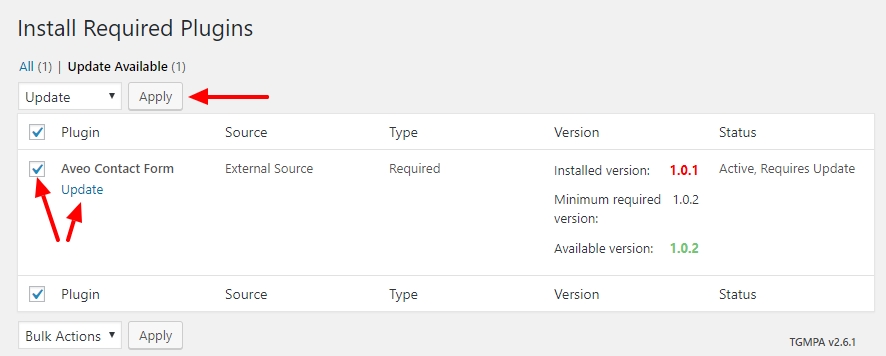
1. Automatic update via the admin panel
After updating the theme, the following message will appear at the top part of the Admin panel:

2. Via the admin panel
- Please open Plugins
- Deactivate the updatable plugin
- Uninstall the updatable plugin
- Install new version of updated plugin (Plugins -> Add New -> Upload Plugin)
3. Using ftp
- Use ftp-client to open folder with installed plugins (../wp-content/plugins/);
- Delete folder with Plugin
- Copy unzipped and updated folder with Plugin
If you have any problems or questions with the update, then write to us and we will be happy to help you as soon as possible. How to contact us is indicated in the Support section of this documentation.
Demo Data
This is built on Unyson framework, so implementing demo contents is a little different and way easier than usual WordPress demo content import.
The demo content file is already inside the theme file you downloaded. All you have to do is follow the below steps to make your website look like our demo.
- Go to Dashboard->Tools->Demo Content Install
- Install the AVEO Theme Demo. This will take a few minutes and once the import is complete you will be redirected to the home page
- Refresh permalinks. Go to Settings->Permalinks, and simply click on Save Changes button.
Animated Demos:
- Aveo Theme Demo (Main Demo)
- Aveo Theme Demo 2: Minimal
Multi-page Demos:
- Aveo Theme Demo - Multi-page
- Aveo Theme Demo 2: Minimal - Multi-page

PS: Please note that all the images in our theme preview will be replaced by dummy images in your demo to avoid any possible copyright violations.
Main Page with Subpages
If you don't want to install demo content with any reason, and you want to have the same pages like on the live demo, please do the following.
AVEO Parent Page
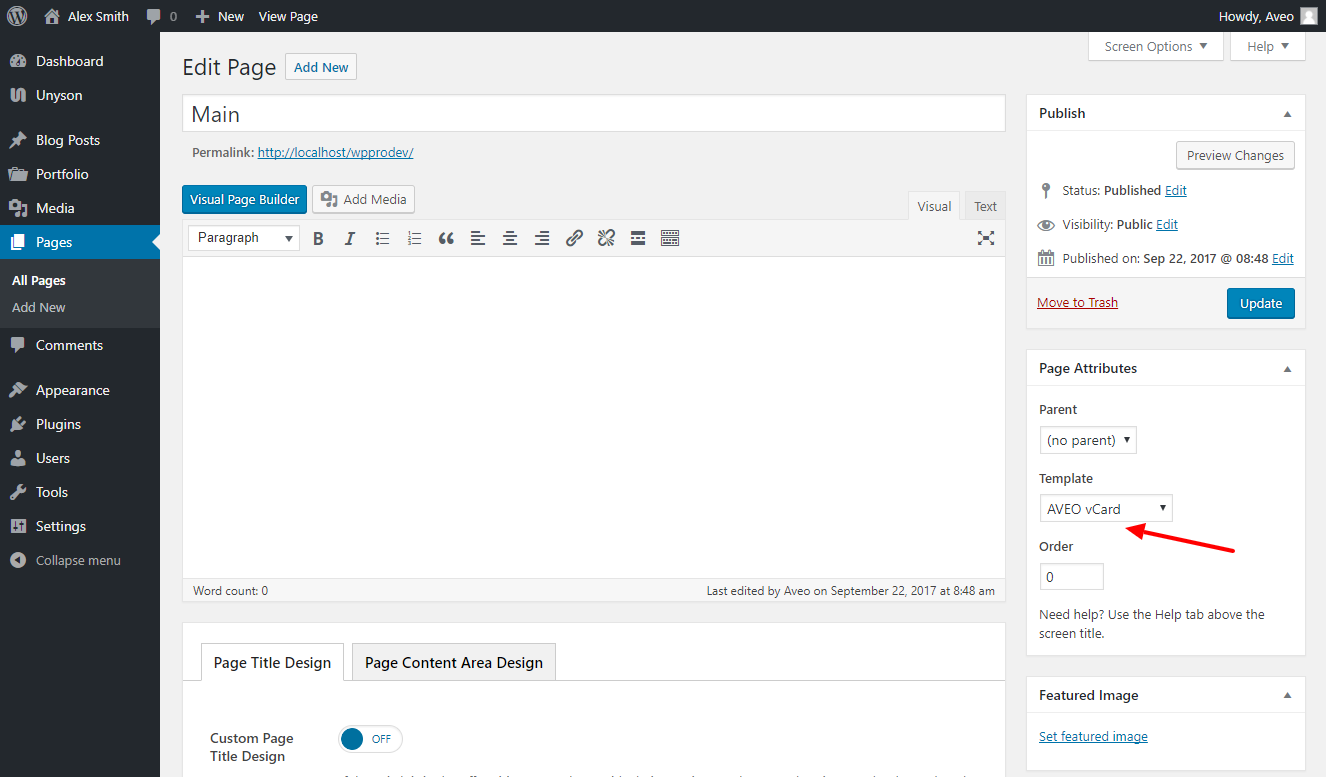
Go to Dashboard -> Pages -> Add New, and choose "AVEO vCard" Template for parent page.
AVEO Subpages
-
Go to Dashboard -> Pages -> Add New, and choose "Default" Template for subpage (section of the parent page, example: About Me, Resume...).
-
Add the content of the page using the Visual Page Builder. More information about the Visual Page Builder can be found here.

Add subpages to the main page.
-
Go to Dashboard -> Appearance -> Widgets.
-
In the "AVEO Template Pages" widget area, add the "+ AVEO Theme - Custom Page" widget.
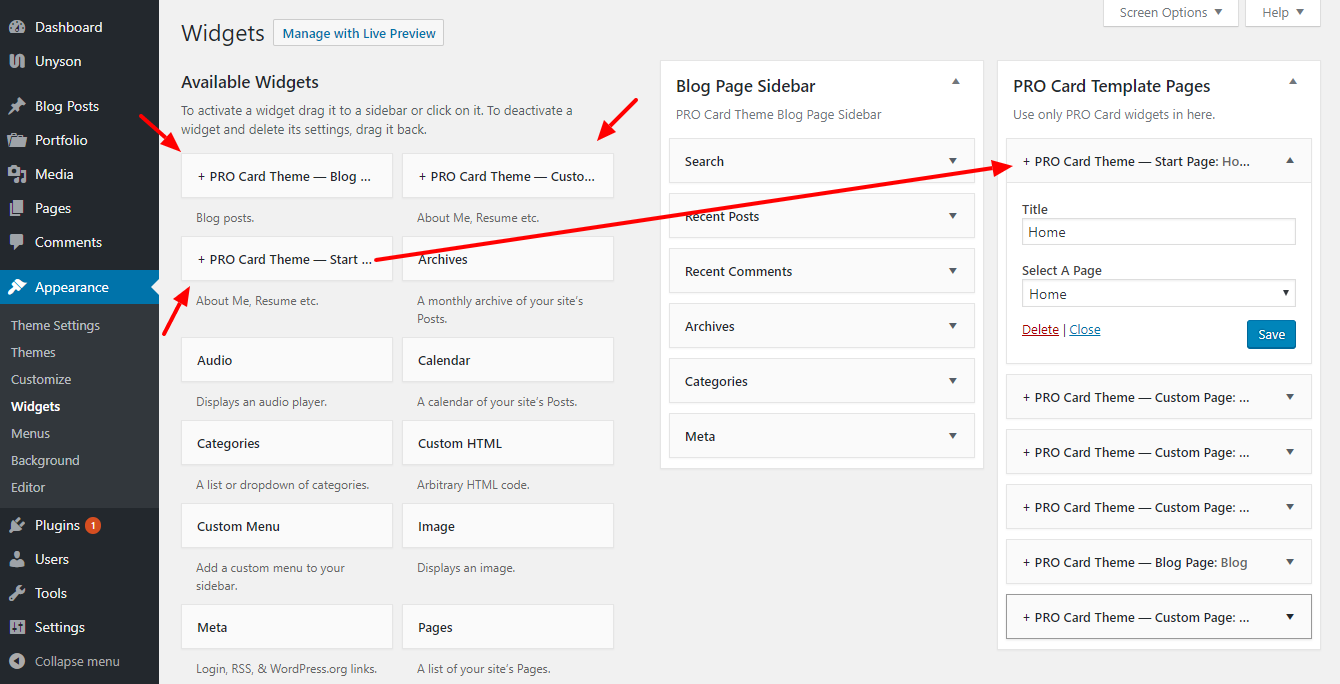
-
Widget options:
Widget options scheme:
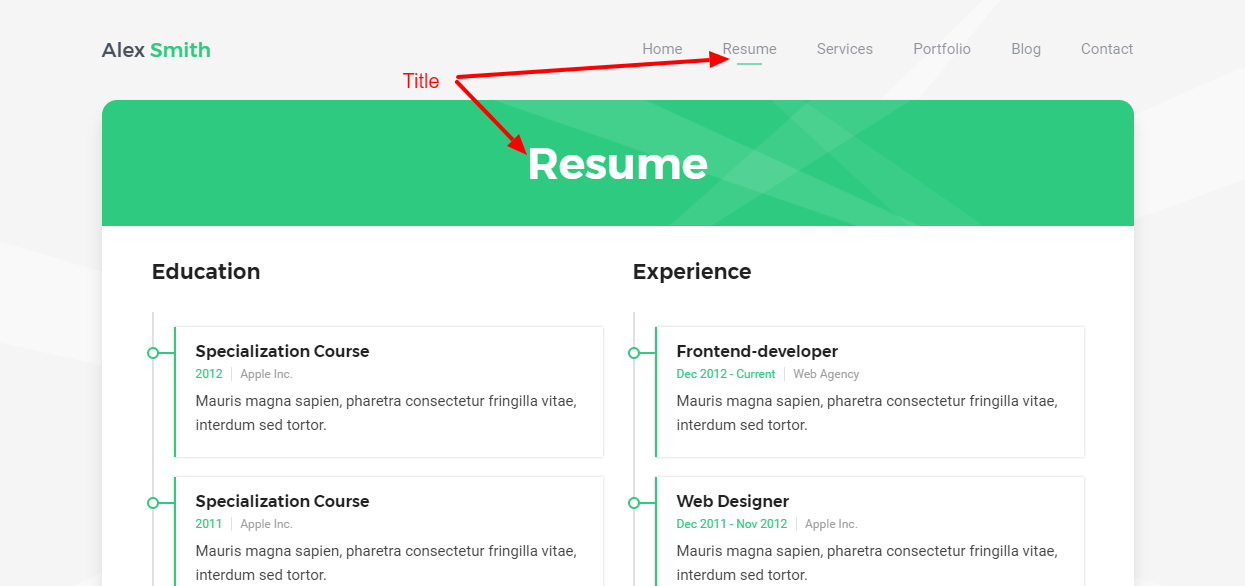
- Title - The title that will be displayed on the page and in the main menu (menu item).
- Select A Page - Your Subpage.
Widgets for "AVEO Template Pages" Widget Area
+ AVEO Theme — Start Page
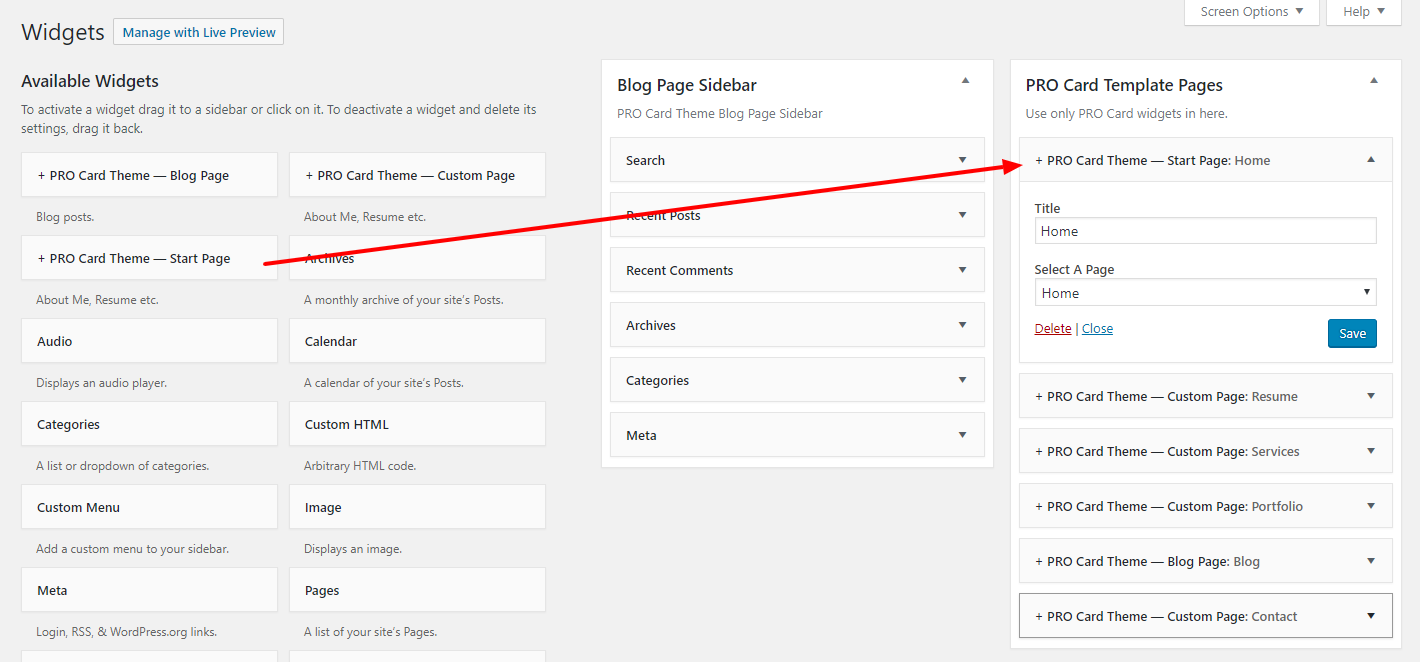
Start Subpage Widget options:
- Title - The title that will be displayed in the main menu (menu item).
- Select A Page - Your Subpage.
+ AVEO Theme - Custom Page
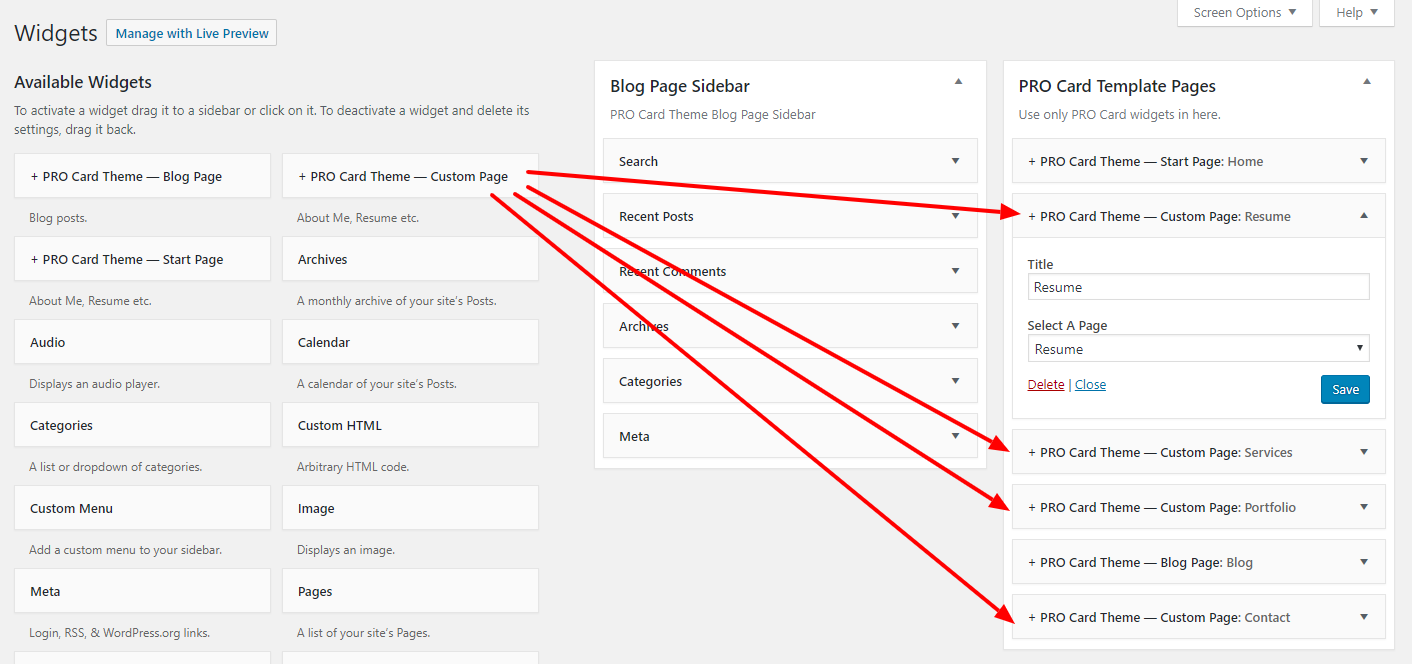
Custom Subpage Widget options:
- Title - The title that will be displayed on the page and in the main menu (menu item).
- Select A Page - Your Subpage.
+ AVEO Theme - Blog Page

Blog Subpage Widget options:
- Title - The title that will be displayed on the page and in the main menu (menu item).
- Select A Page - Your Subpage.
- Content Editor: Enable content editor - Display content from Content Editor (by default, content will be displayed after blog posts). Show content editor on the top - In this case, the content will be displayed before the blog posts.
- Layout - Three options - 1 column, 2 columns and 3 columns.
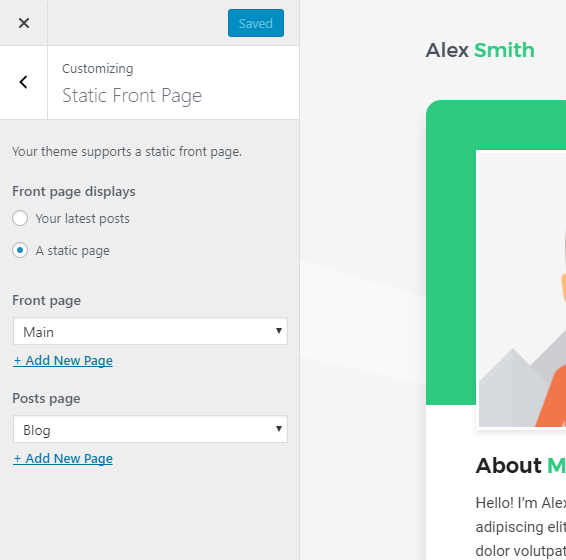
WordPress Front Page
In order for your main page with subpages to be displayed first when the site is loaded, you need to do the following:
- Go to Dashboard -> Appearance -> Customize -> Static Front Page.
- Front page displays set A static page
- Front page set Main
- Posts page set Blog
Main Menu
For the main page, the menu is created automatically, the menu items are taken from the widgets of the AVEO Template Pages widget area. In addition to the automatically created menu, you can add links, in the menu "AVEO Template Additional Menu".
For all other pages you can use the menu "Classic Menu".
More about the Classic Menu
Once again, this menu appears on such pages as a blog, etc., for the main page with subpages: Home, Resume, Services, etc. the menu is created automatically from widgets.
In our demo, in the Classic menu, we added anchor links that lead to the subpages of the main page (Home, Resume, Services, etc.). To add an anchor link, you need to do the following:
-
Go to Admin Dashboard --> Appearance --> Menus
-
Enable the additional property
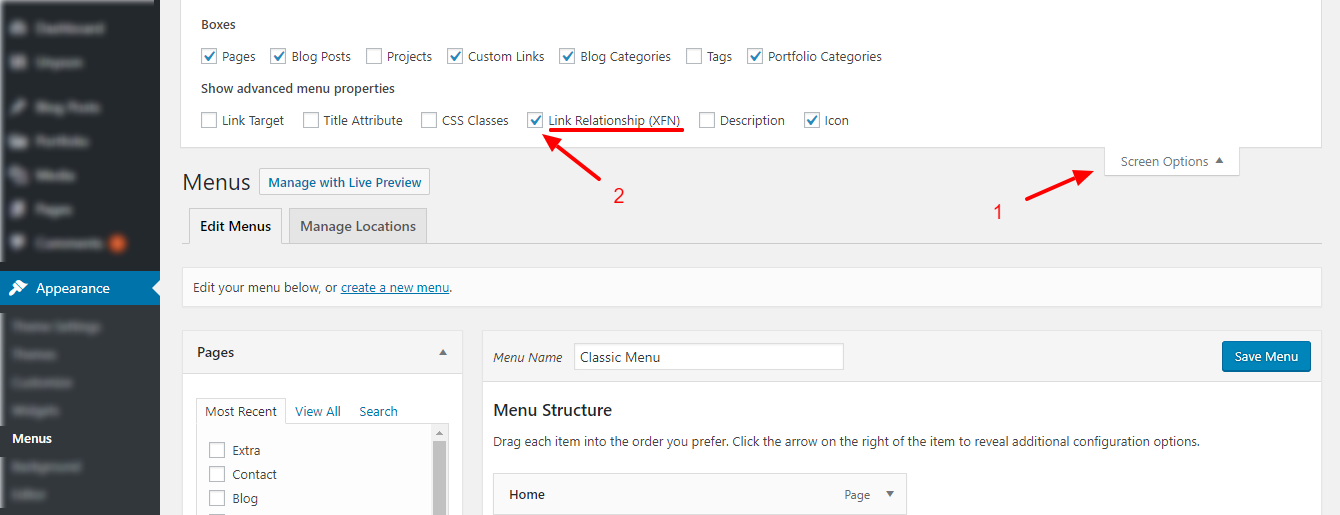
-
Add anchor link
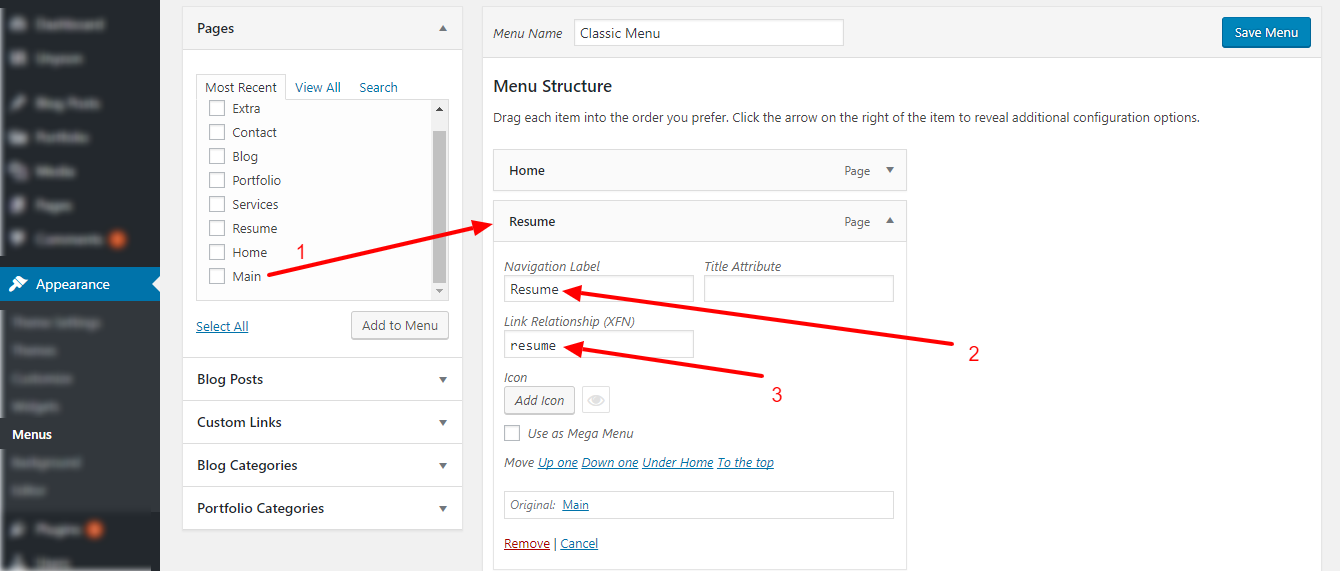
Result (example from our demo): http://lmpixels.com/wp/aveo/#resume
Working with Subpages of the Animated Version
In the animated version of the theme, the Main page is used (the layout of this page should be empty, the following template should be selected for it: AVEO vCard), we called it Main, the Subpages - Sections (Home, Resume, Portfolio ...) are connected to this page using the widgets (Admin Panel --> Appearance --> Widgets). The menu for the Main page is created from widgets automatically. For all other pages (for example blog posts), the Classic menu is used (Admin Panel --> Appearance --> Menus).
The work with subpages is described in more detail in the following sections of this documentation:
Multi-page Version
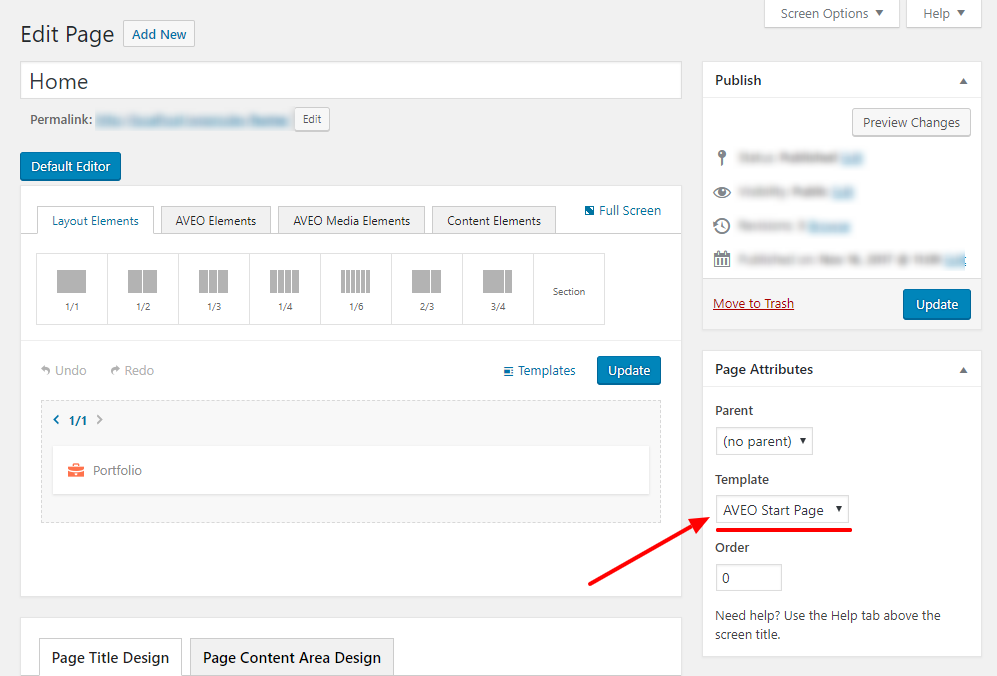
Starting with version 1.1.0 in our theme, a multi-page display of content is possible. In this version, the pages are displayed separately, not in the form of subpages, without animation effects when navigating to other pages. Example - Multi-page Demo.
For this version, you do not need to apply widgets and the Main Page with the AVEO template vCard Template. You simply create pages and add them to the Classic menu. For the Home page you need to select the AVEO Start Page template:
Unyson Visual Page Builder. Shortcodes.
Unyson frameworks supports the shortcodes and page builder used in AVEO Theme. Using Unyson page builder is pretty easy and self-explanatory.
Setting up a visual page builder:
-
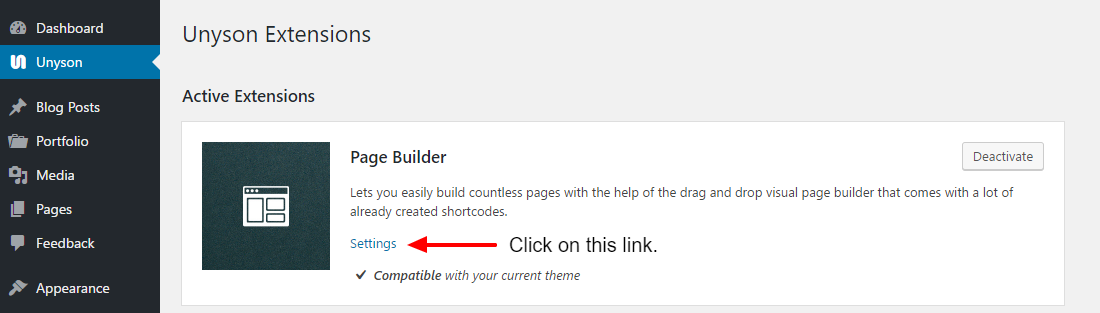
Go to Dashboard -> Unyson.
-
Click the Settings link of the Page Builder extension.
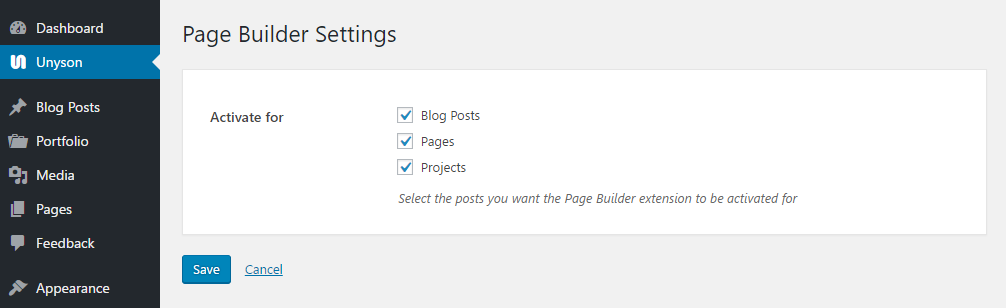
-
Activate Page Builder for:
- Blog Posts
- Pages
- Projects
Create pages using the Visual Page Builder. Shortcodes.
There are 4 main types of design elements as follows:
Layout elements – They help you create columns.
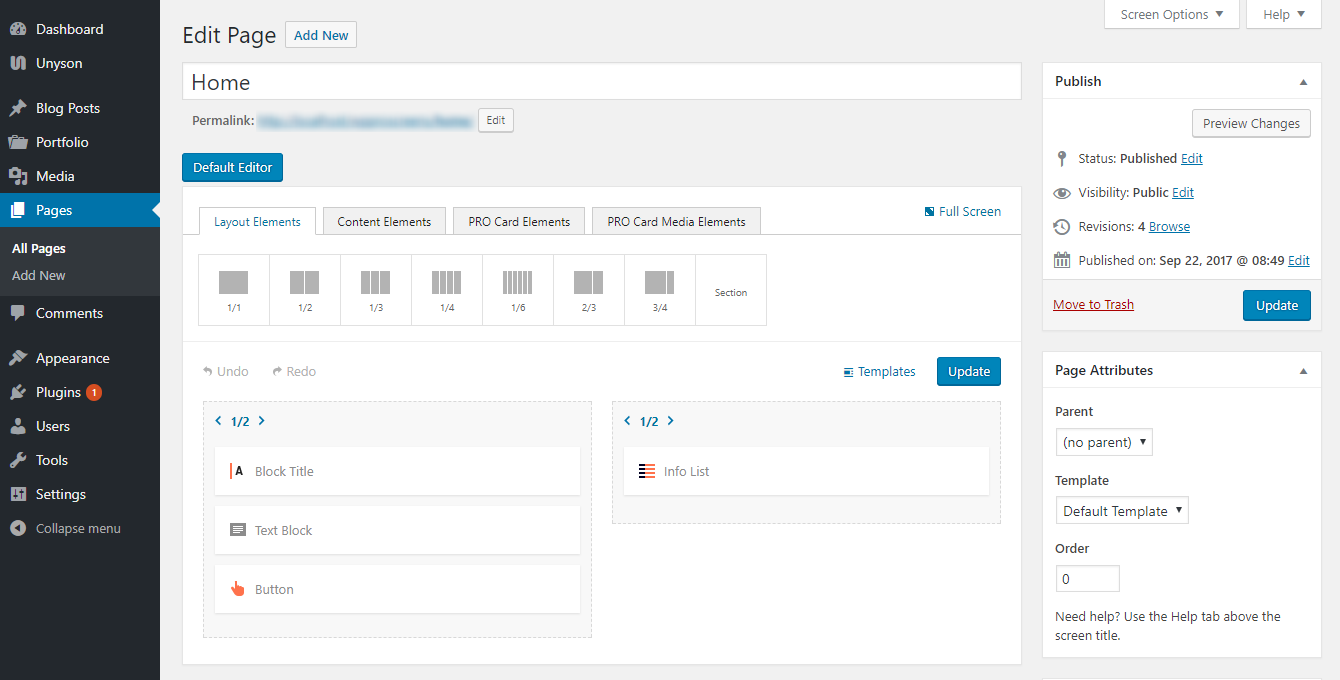
- 1/1, ½, 1/3, ¼, 1/6, 2/3 and ¾ elements – Create columns with widths as indicated by their names. For example a ½ element creates a column 50% the width of the page.
- Section – It creates a full width area where you can add contents and images. You can add a background color or image for this area. It has lots of options which are given in detail there.
Content Elements – It consists of a number of design elements.
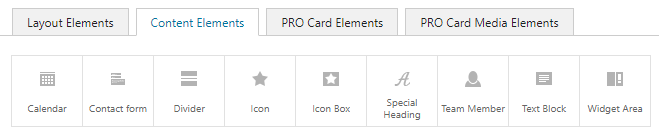
- Calendar – Will help create a calendar of busy days.
- Divider – Horizontal divider and white space.
- Icon – Icon.
- Icon Box – Icon + Titile + Text.
- Special Heading – Add a Special Hedding.
- Team Member – Team member.
- Text Block – Text.
- Widget Area – Add a widget area.
AVEO Elements – These are shortcodes we created specially for AVEO WordPress theme.
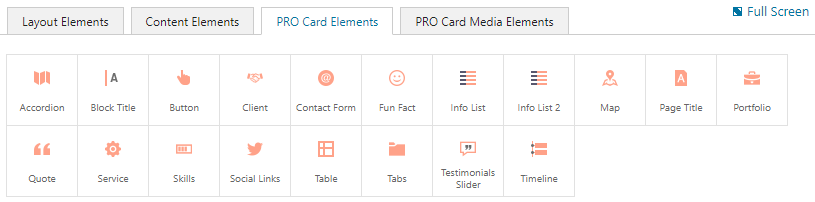
- Accordion – Add a Accordion.
- Block Title – Add a Block title.
- Blog Posts – Add a Blog Posts Masonry Grid (Available since AVEO version 1.1.0).
- Button – Add Button.
- Client – Add a Client block.
- Clients Slider – Add a slider with logos.
- Contact Form – Add a Contact form.
- Contact Form 2 – Add a Contact form with the ability to edit and add fields.
- Fun Fact – Add a Fun fact block.
- Infol List – Add the information list: title + description.
- Infol List 2 – Add the information list: icon + description.
- Map – Add Google map.
- Page Title – Add a Title for the page.
- Portfolio – Add a Grid with your projects.
- Quote – Add a Quote.
- Service – Add a block with information about the service.
- Skills – Add a block with skills.
- Social Links – Add Social icons.
- Table – Add a Table. Two options: a regular table and a table with prices.
- Tabs – Add tabs.
- Testimonials Slider – Add a slider with reviews.
- Timeline – Add a Timeline. For example work experience and education.
AVEO Media Elements.
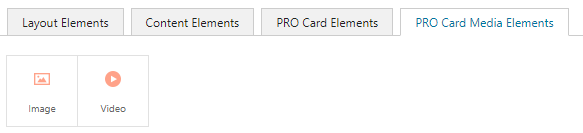
- Image – Add responsive images.
- Video – Add YouTube or Vimeo responsive video.
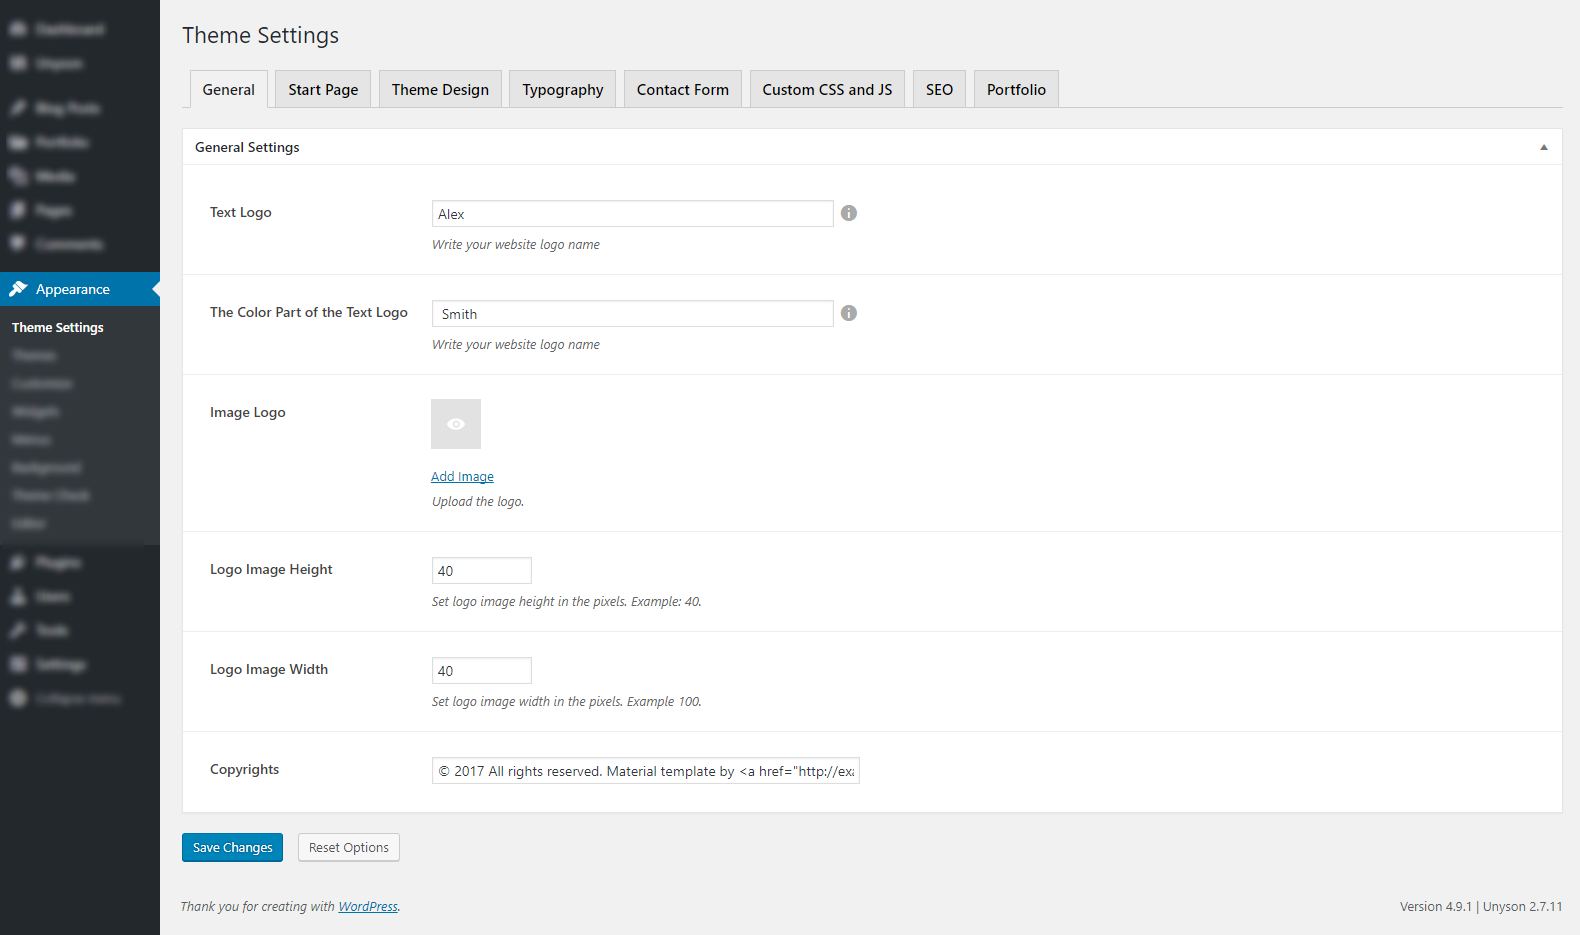
Theme Settings
AVEO Theme comes with a very powerful Theme Settings panel based on Unyson Framework. After the theme and Unyson plugin are installed you can access this panel by logging into the WordPress dashboard and clicking on Appearance -> Theme Settings.
Contact Form Settings
Shortcodes Contact Form and Contact Form 2 work with the help of our plugin AVEO Contact Form.
In order for the contact form to start functioning, you need to specify your email address: Admin Panel --> Appearance --> Theme Settings --> Contact Form tab --> Your Email Address field. Example: youraddress@gmail.com.
Some hosting providers forbid the sending of messages from their server without specifying the real address of the hosting administrator. In this case, you need to provide your email address: Admin Panel --> Appearance --> Theme Settings --> Contact Form tab --> Hosting Admin Email Address. Examples of such addresses are: info@yourdomain.com, admin@yourdomain.com. On the example of our demo: info@lmpixels.com.
Important: when testing the contact form, letters can get into the spam folder, depending on the settings of your mailbox. So if you are having problems, do not forget to check this folder. If you have any questions, we will gladly help you - SUPPORT.
Portfolio
To add a new project, go to Portfolio -> Add New.
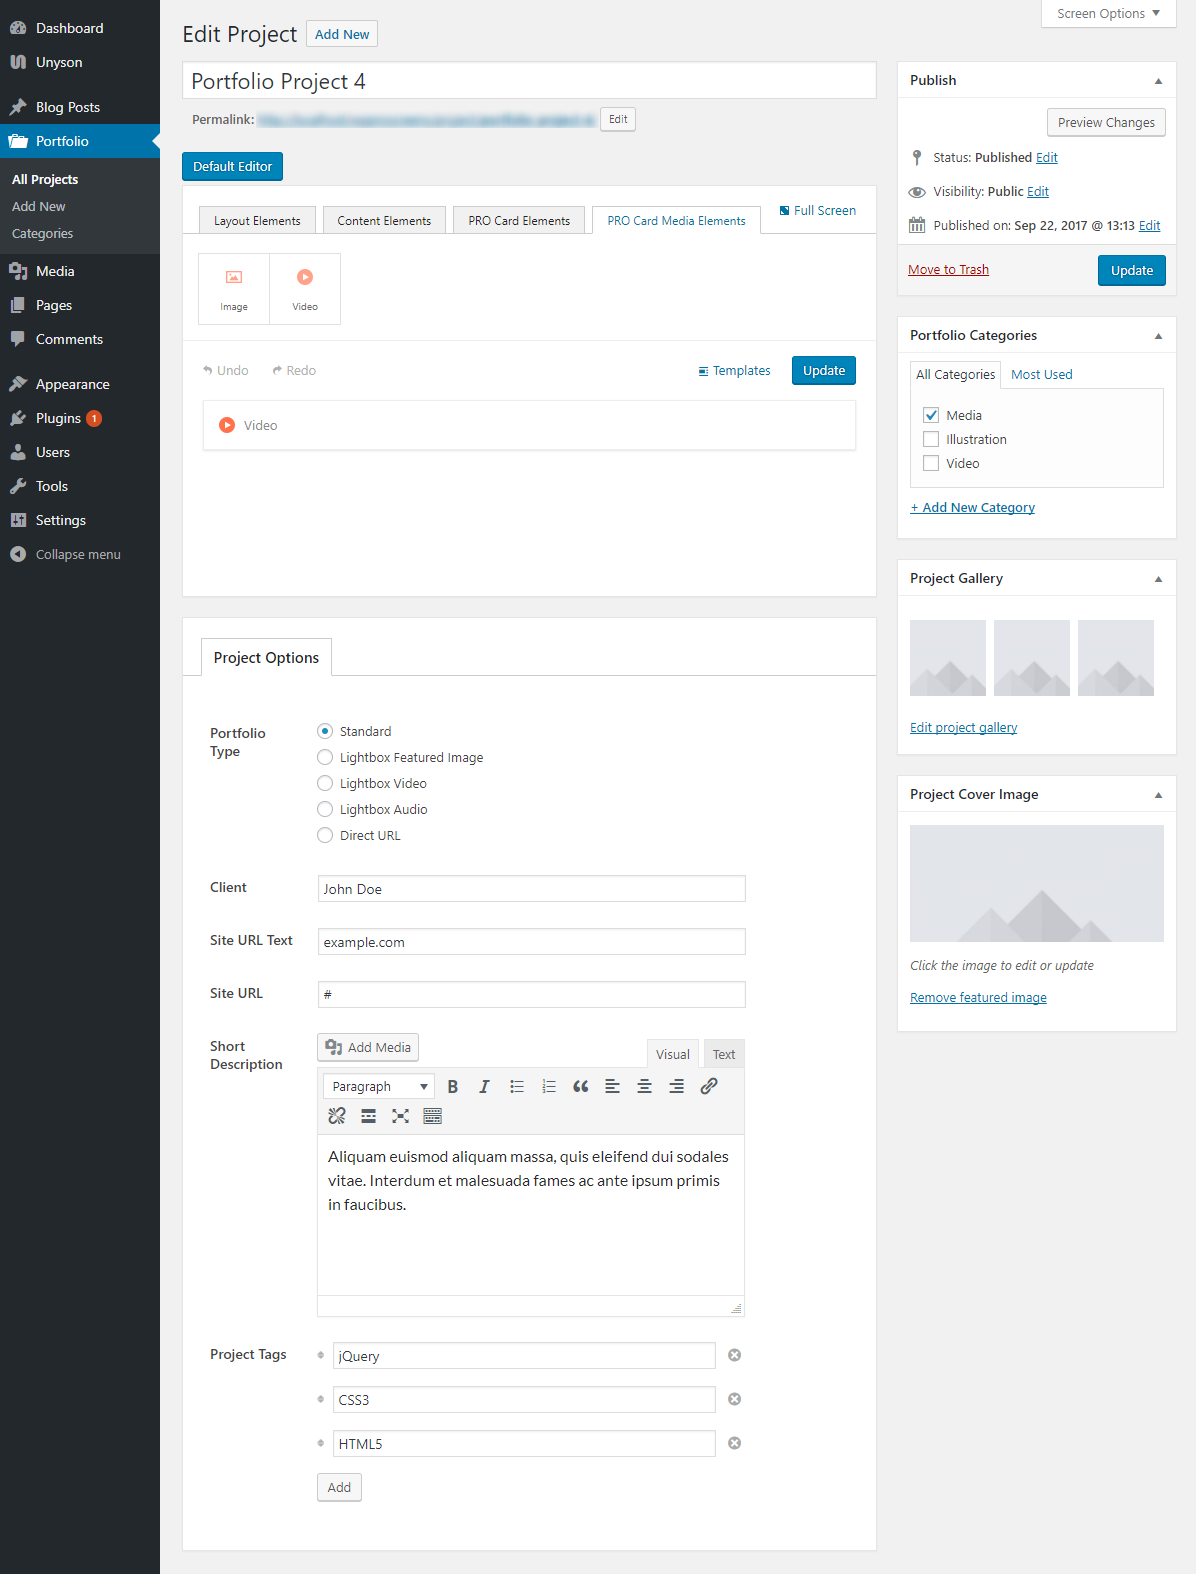
There are five types of projects available - Portfolio Type block (this is how it will be displayed when you click on a project in the projects grid - AVEO Portfolio Shortcode):
- Standard - A detailed project page that opens with the help of Ajax.
- Lightbox Featured Image - An enlarged image that opens when clicking on a project cover image in the projects grid.
- Lightbox Video - A video that opens when clicking on a project cover image in the projects grid.
- Lightbox Audio - SoundCloud audio that opens when clicking on a project cover image in the projects grid.
- Direct URL - Link to a page or external resource.
More about the standard type of portfolio
In addition to the basic options for this type of portfolio, you can fill the block with the content of the page, for example here you can place such shortcodes as video, image or just additional textual information.
Project Cover Image
This is an image that will be displayed in the portfolio grid (in our demo this is the Portfolio page). This block is required.
About Shuffle js plugin: This JS plugin is responsible for displaying the projects (figure with an Project Cover Image) in the portfolio grid as it possible tightly to each other + it is responsible for sorting projects into categories (filters).
Project Gallery
This block is relevant only for the Standard Portfolio Type. The recommended images width is minimum 800 pixels. The height of the images in the gallery may differ, the height of the slider will be adjusted automatically to the height of the active image.
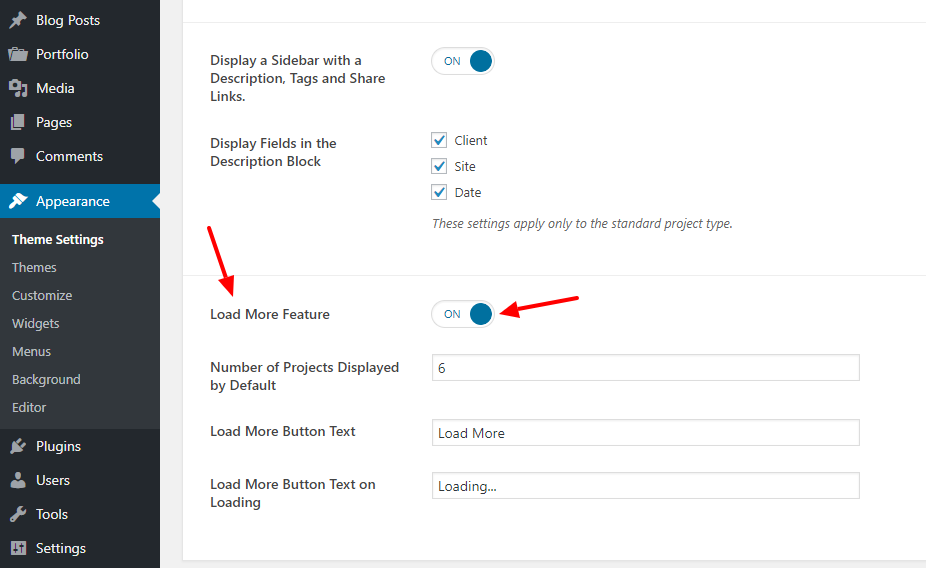
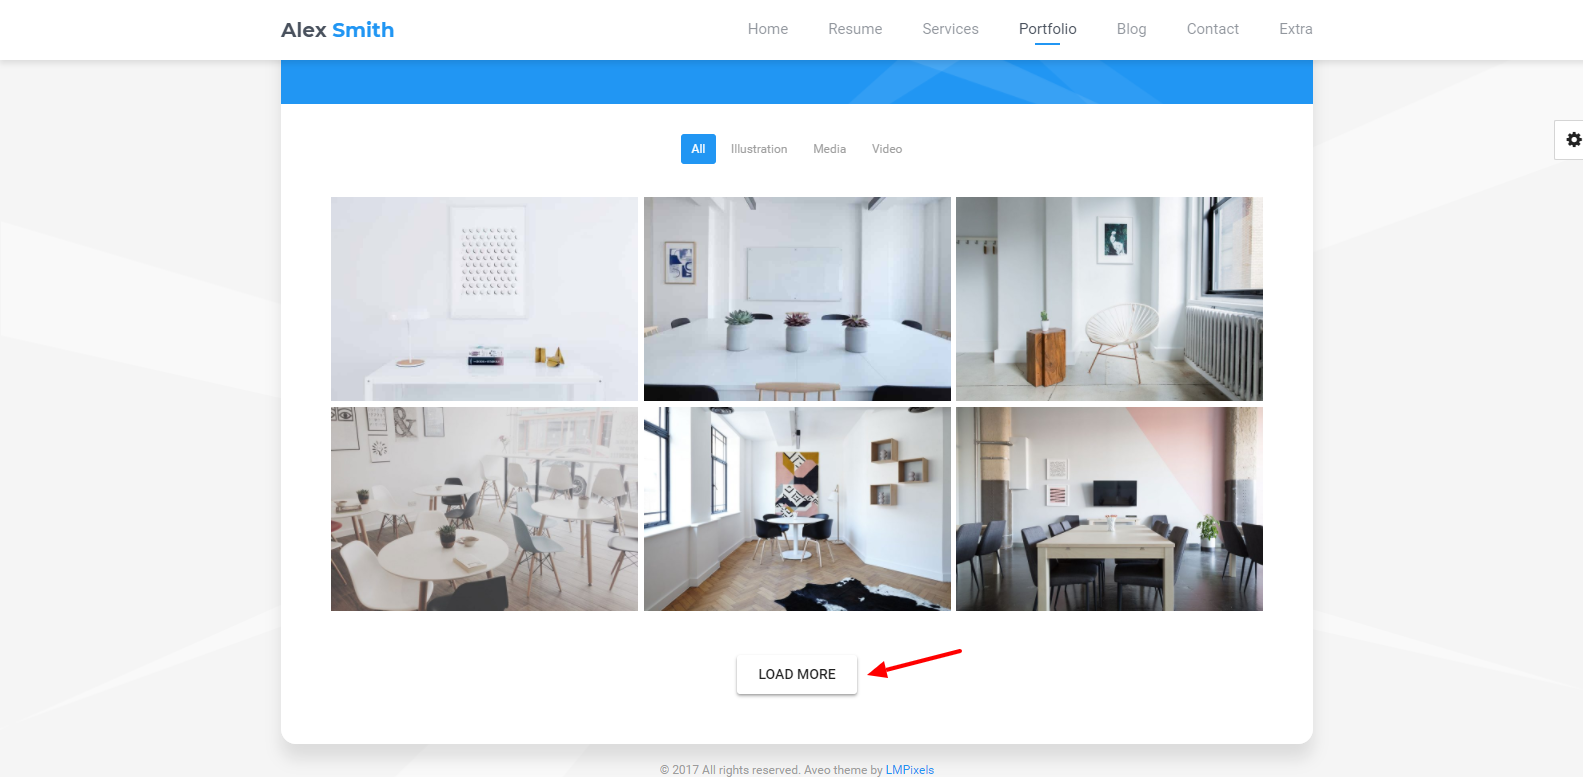
"Load More" Feature
With this feature, you can display a certain number of projects in the portfolio grid, in addition, the "Load more" button will be displayed, clicking on which additional projects will be loaded. To activate this feature, go to: Administrator Panel --> Appearance --> Theme Settings --> Portfolio tab --> Load More Feature --> On.
Result:
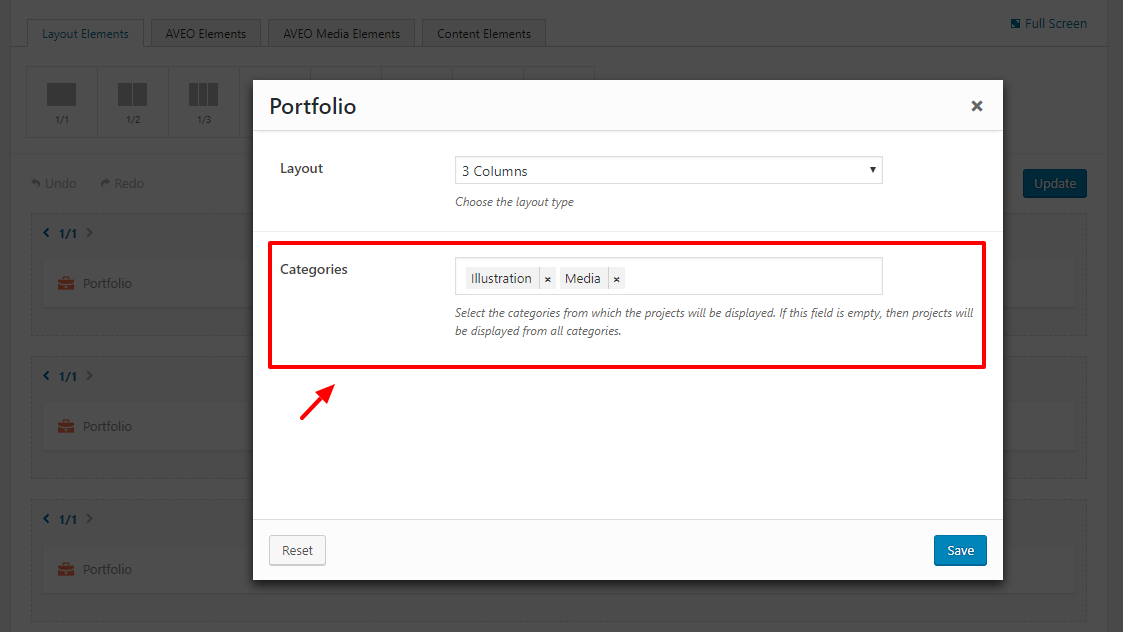
Portfolio Shortcode: Display projects from certain categories
In the version 1.1.3 we added the ability to display projects only from certain categories.
With this feature, you can display this shortcode on various pages, thereby dividing the types of projects. Shortcode Portfolio can be added only to pages, it can not be placed in projects (Standard Project Type).
Using this functionality:
-
Add a shortcode Portfolio to the page layout using the Visual Page Builder
-
In the Shortcode Portfolio settings, add the categories you want to display. If this field is empty, portfolio projects from all categories will be displayed.
YouTube and Vimeo Video Embedding
Link format for embedding videos in the Media Video shrtcode and in the Portfolio project page:
YouTube: https://www.youtube.com/embed/id. Example: https://www.youtube.com/embed/w5tWYmIOWGk
Vimeo: https://player.vimeo.com/video/id. Example: https://player.vimeo.com/video/97102654
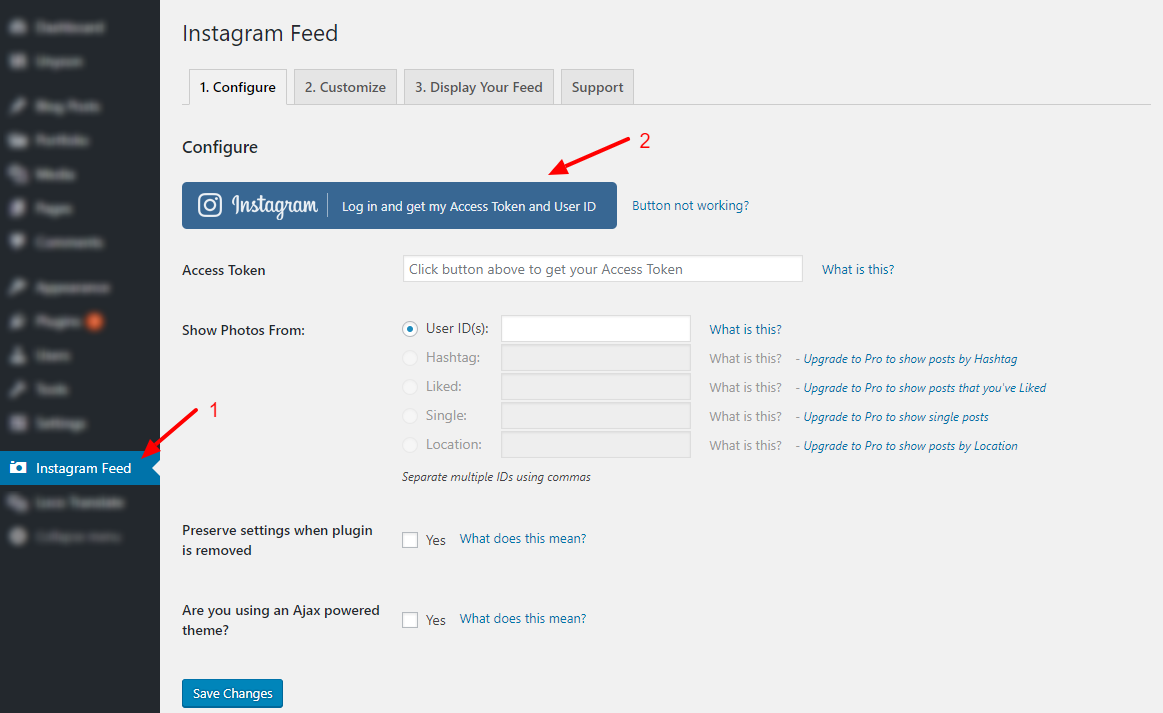
Instagram Feed
You can add Instagram Feed to any page of your site, for this you need to do the following:
-
Install and activate this plugin - Instagram Feed. Instructions for installation.
-
Go to the settings page of this plugin. Admin Panel --> Instagram Feed.
-
Click on the button "Log in and get my Access Token and User ID":
-
After that, copy the received User ID in the field Show Photos From: User ID(s):
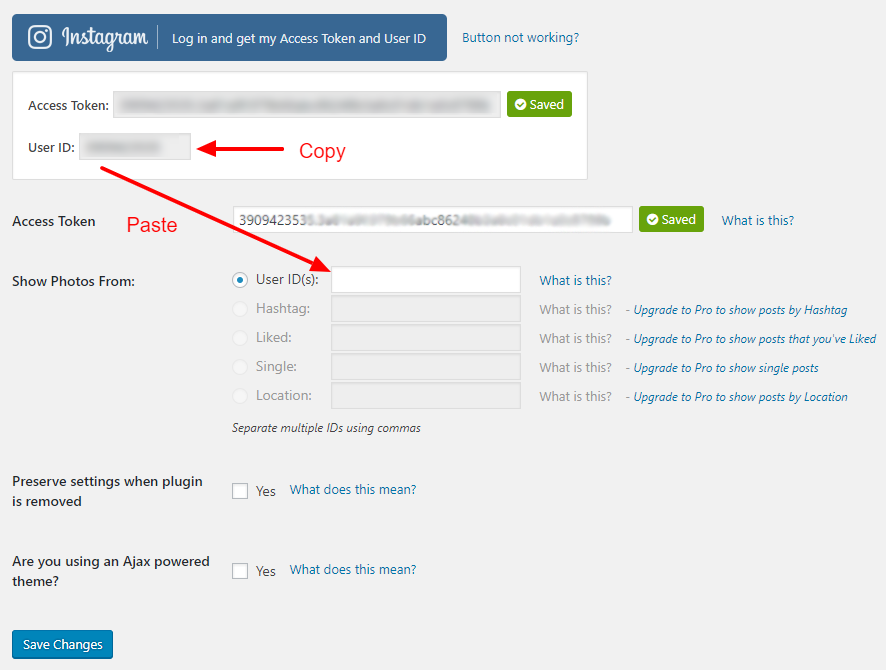
-
Save changes
-
Go to the page editing page, to which you want to add the Instagram Feed
-
Add Shortcode Text to page layout. Paste the following code [instagram-feed] into it:
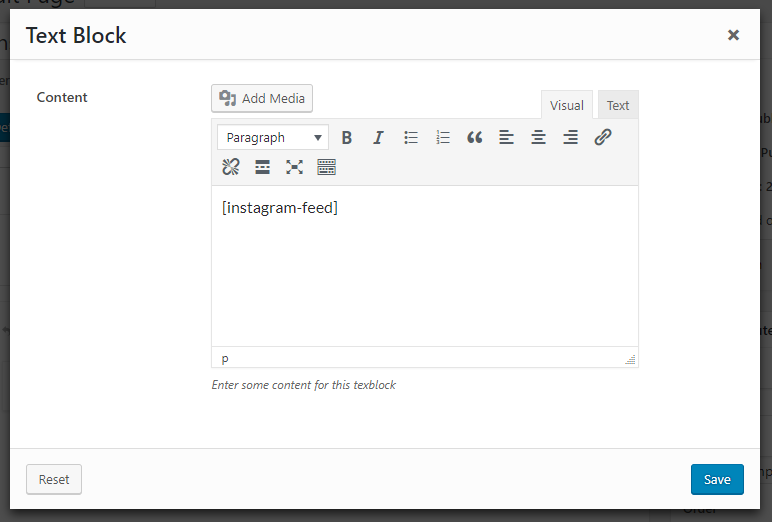
-
Save changes.
Fonts
We've used various types of fonts in this theme.
- Montserrat (Google fonts).
- Roboto (Google fonts).
Credits
- Unyson Framework - http://unyson.io/
- Bootstrap - Bootstrap JS.
- imagesloaded.pkgd.min.js - Detect when images have been loaded.
- jquery.hoverdir.js - DirectionAwareHoverEffect.
- jquery.shuffle.min.js - Categorize, sort, and filter a responsive grid of items.
- jquery.magnific-popup.min.js - Magnific Popup is a responsive lightbox & dialog script with focus on performance and providing best experience for user with any device.
- masonry.pkgd.min.js - Cascading grid layout library
- modernizr.custom.js - Modernizr is a JavaScript library that detects HTML5 and CSS3 features in the user’s browser
- owl.carousel.min.js - Touch enabled jQuery plugin that lets you create a beautiful responsive carousel slider.
- page-transition.js - Page transitions and ajax loaded pages.
- validator.js - Contact form validator.
FAQ
-
Q: I edit the menu, but the changes do not apply
A: In the animated version of the theme, the Main page is used, we called it Main, the Subpages - Sections (Home, Resume, Portfolio ...) are connected to this page using the widgets (Admin Panel --> Appearance --> Widgets --> Aveo Template Pages). The menu for the Main page is created from widgets automatically. For all other pages (for example blog posts), the Classic menu is used. More about the Main Page and widgets you can read here and here. More about the Main Menu you can read here.
-
Q: How to Fix WordPress Posts Returning 404 Error.
A: Go to Settings -> Permalinks, and simply click on Save Changes button. Read more - http://www.wpbeginner.com/wp-tutorials/how-to-fix-wordpress-posts-returning-404-error/
-
Q: The detailed portfolio page does not load
A: Go to Settings -> Permalinks, and simply click on Save Changes button. Read more - http://www.wpbeginner.com/wp-tutorials/how-to-fix-wordpress-posts-returning-404-error/
-
Q: How can I change the default words?
A: As example: Install and activate this plugin - https://wordpress.org/plugins/replace-default-words/, then go to the Admin Dashboard -> Tools -> RDW and in the "Enter the default word" for example enter Send message, and in the field "Enter the new word" your new words.
-
Q: How can I translate WP theme and plugins?
A: As example: With the help of this plugin - https://wordpress.org/plugins/loco-translate/. Documentation/Instruction - https://localise.biz/wordpress/plugin/beginners .
-
Q: Design changes do not apply.
A: 1. Clear your browser's cache. 2. Clear your server's cache (hosting). On an example of hosting from GoDaddy: Go to WordPress Admin Panel -> Top Panel -> GoDaddy -> Flush Cache. If this does not help, then most likely the problem is in the incorrect server settings, in this case it's best to contact your hosting support, but also we can help, for this we need access to the administrator's panel of your site and FTP access to the hosting.
-
Q: How can I use the Brizy Page Builder?
A: At the moment, our theme is not support the Brizy Page Builder, instead of it in our theme is used Unyson Visual Page Builder.
-
Q: Google Maps do not work.
A: June 11th, 2018 Google has changed the Google Maps API rules. You just need to create your key and replace our one, which we used in the demo data: Admin Panel -> Pages -> Contact -> Map Shortcode -> Google Maps API key.
A link to the Google console is available in the same place, in the shortcode settings.
-
Q: What are the minimum requirements for the host?
Support
If you have any questions or need help don’t hesitate to contact us via email help@lmpixels.com, our profile page or Support Form (we respond to messages sent via this form as quickly as possible). We do not provide support through comments. All frequently asked questions will be added to the FAQ section of this documentation.
Our team will help you within one working day, usually we respond within one hour, some delays are possible on weekends (given the difference in time zones).
Once again, thank you so much for purchasing this theme. As We said at the beginning, We'd be glad to help you if you have any questions relating to this theme.
LMPixels Team